

Start here
Understanding Your Wall Type
Gather supplies
Tools and Materials You'll Need
First repair
Repairing Small Holes and Scuffs
Bigger jobs
Patching Medium to Large Holes
Cracks
Fixing Hairline Cracks
Final step
Finishing, Sanding, and Painting
Understanding Your Wall Type
Before reaching for any filler, identify what your walls are made of - the repair approach differs significantly.
Drywall (also called gypsum board or sheetrock) is standard in homes built after the mid-20th century. It has a paper facing over a gypsum core and is lightweight and easy to patch. Plaster walls are found in older homes, often multi-layered, and denser. They crack differently and require slightly different materials.
To tell them apart: knock on the wall. Drywall sounds hollow; plaster sounds solid and harder. Plaster walls also typically have some flex when you press them, while drywall feels firm but can dent.
Drywall
A wall panel made of gypsum plaster sandwiched between two layers of paper, widely used in home construction since the mid-20th century.
Joint compound
A premixed paste used to fill gaps, cover seams, and finish drywall. Often called 'mud' by contractors. It dries slowly and is ideal for larger repairs.
Spackle
A fast-drying filler paste suited for small holes and dings. It shrinks less than joint compound and is easier for quick touch-ups.
Feathering
The technique of smoothing compound outward from a repair in thin, tapering layers so it blends invisibly into the surrounding wall surface.
Primer
A preparatory coating applied to surfaces before paint. It seals porous materials like joint compound and helps paint bond evenly.
Mesh patch
A self-adhesive fiberglass mesh square placed over a hole to provide a surface for joint compound to grip when repairing medium-sized damage.
For most homeowners in modern construction, the steps below apply to drywall. If you suspect plaster - or if you're unsure - consult our home improvement glossary for definitions that can help you navigate repair guidance.
Tools and Materials You'll Need
Wall repair doesn't demand a large toolkit. Most jobs require only a handful of items, many of which you may already own.
- Putty knife or drywall knife (3-6 inch blade for small repairs)
- Spackle or lightweight joint compound - spackle for small holes, joint compound for larger patches
- Self-adhesive mesh patch - for holes larger than about an inch in diameter
- Sandpaper - 120-grit for between coats, 220-grit for final smoothing
- Sanding block or sponge
- Primer - essential before repainting
- Paint - matched to your existing wall color
- Damp cloth or tack cloth - for wiping dust
For larger repairs (holes over 4-6 inches), you'll also want a drywall patch panel or a piece of drywall cut to size, drywall screws, a drywall saw, and furring strips or backer boards to anchor the patch.
Repairing Small Holes and Scuffs
Match Your Filler to Your Hole Size
Use spackle for nail holes and minor surface damage - it dries faster and is easier to sand for small jobs. Reserve joint compound for anything larger than about a half-inch, where multiple coats and better adhesion matter. Using the wrong product can mean more coats, more shrinkage, or a finish that cracks over time.
Nail holes, small dents from doorknobs, and surface scuffs are the most common wall injuries - and the easiest to fix.
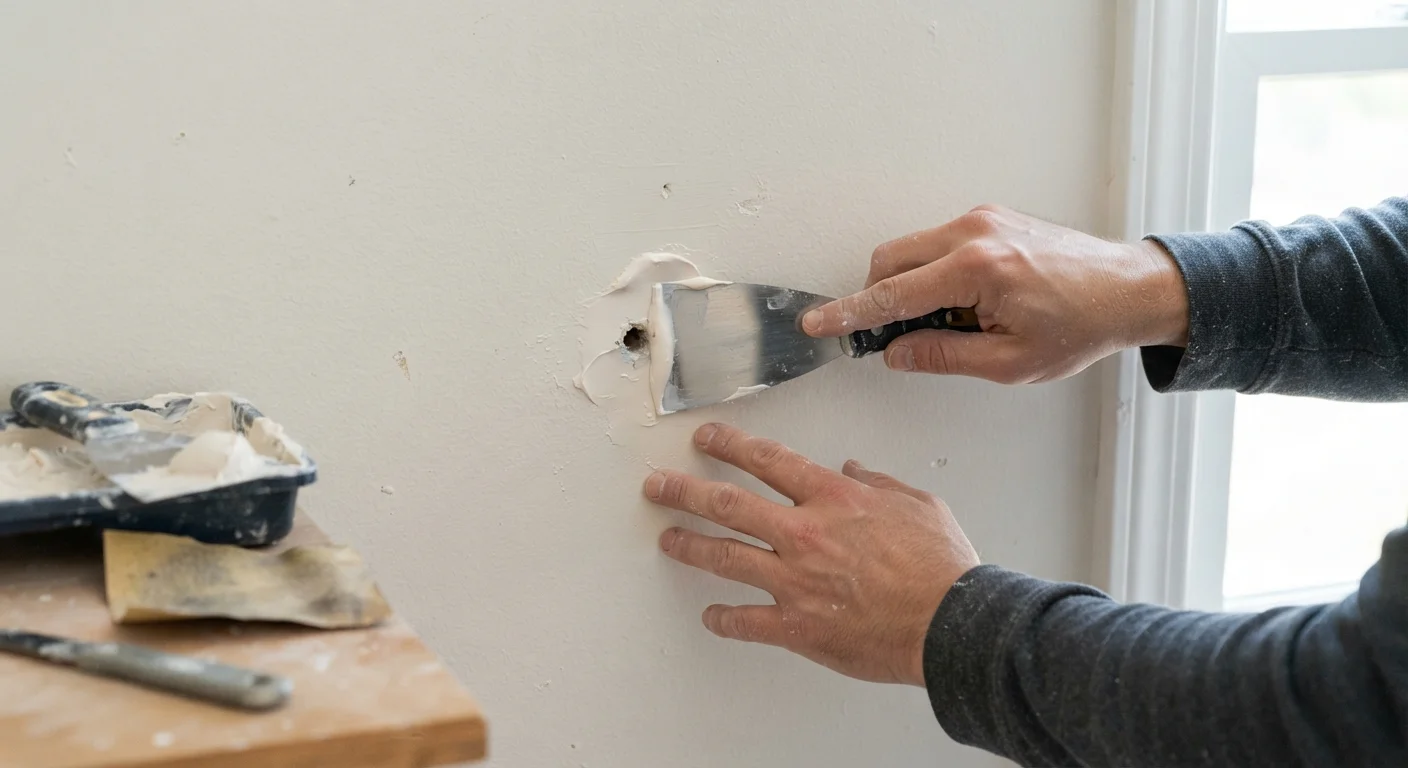
- Clean the area. Remove any loose paper, debris, or paint edges around the damage with a putty knife or your fingernail.
- Apply spackle or joint compound. Using a putty knife, press a small amount of filler into the hole. Overfill slightly - it will shrink as it dries.
- Smooth it out. Drag the putty knife at a low angle across the surface to remove excess filler and leave the patch flush with the wall.
- Let it dry completely. Don't rush this step. Check that the patch looks uniformly white and dry.
- Sand smooth. Use 220-grit sandpaper to lightly sand the area until it blends seamlessly with the surrounding wall.
- Wipe clean, then prime and paint.
Patching Medium to Large Holes
Holes from doorknobs, anchors pulled from walls, or accidental damage - typically 1 to 6 inches across - require a bit more structure before filling.
For holes up to about 4 inches: Apply a self-adhesive mesh patch over the hole, pressing it flat. Apply joint compound over the mesh in thin layers, feathering the edges outward 4-6 inches to blend gradually. Two to three coats are usually needed, with drying and light sanding between each.
For larger holes (over 4-6 inches): You'll need to cut the damaged area into a clean square or rectangle and install backer boards behind the wall cavity to support a new piece of drywall. This involves more steps and some comfort with basic carpentry. If you're not sure you're ready, our guide on when to hire a contractor can help you decide whether a pro makes more sense for your situation.
Fixing Hairline Cracks
Hairline cracks often appear from normal house settling, humidity changes, or temperature swings. Most are cosmetic and not a sign of structural concern - though recurring cracks or those that widen over time are worth monitoring. Check out our article on common home maintenance myths for context on what wall cracking typically means (and doesn't mean).
When to Take Cracks More Seriously
Most hairline cracks are harmless results of normal settling. However, cracks that are wider than a quarter-inch, diagonal cracks originating from door or window corners, or cracks that grow noticeably over weeks may indicate a structural or moisture issue. In those cases, it's worth consulting a licensed structural professional before simply patching over the damage.
- Widen the crack slightly. Use the corner of a putty knife or a painter's tool to open the crack a hair - this gives the filler something to grip. Remove any loose material.
- Apply joint compound. Press compound firmly into the crack, then smooth it flat with the putty knife.
- Embed paper tape (optional but helpful). For cracks that have reappeared before, press paper drywall tape over the wet compound and smooth it with a second thin coat of compound. This helps prevent the crack from returning through the repair.
- Allow to dry fully, then sand smooth.
Finishing, Sanding, and Painting
A patch that's been filled and dried but not finished properly will show through paint as a dull spot or visible ridge. This final stage makes or breaks the repair.
- Sand progressively. Start with 120-grit, then finish with 220-grit. Always sand in a circular motion and feather out from the patch center.
- Wipe away dust. Use a damp cloth and allow the surface to dry. Dust left on the wall prevents primer from bonding properly.
- Prime before painting. Apply a thin coat of primer to the repaired area (or the entire wall if the repair is large). This seals the compound and ensures paint absorbs evenly.
- Match your paint sheen. Paint a flat wall with flat paint, an eggshell with eggshell, and so on. Even correct color can look mismatched if the sheen differs.
For textured walls, blending texture is an art in itself. Practice your technique on a scrap piece of drywall before touching the repaired area. Small touch-ups done carefully are usually far less visible than homeowners fear once dry and painted.
Frequently Asked Questions
Drying time depends on humidity, temperature, and coat thickness. A thin coat typically dries in 24 hours under normal indoor conditions. Always wait until the compound appears uniformly white with no dark wet spots before sanding or applying another coat.
You can, but the repair area will absorb paint differently than the surrounding wall, often leaving a dull spot. Always apply a coat of primer to the patched area before painting to get a uniform finish.
Spackle is a premixed filler designed for small repairs - it dries faster and shrinks less. Joint compound (also called mud) is better for larger patches and feathering seams, but requires more drying time between coats.
If cracks are wide, recurring, or accompanied by doors and windows that stick or gaps around frames, they could signal a structural or settling issue. These warrant a professional inspection. Similarly, if your walls contain asbestos (common in homes built before 1980), don't disturb them without expert guidance.
Texture matching takes practice. Common techniques include stippling with a sponge, using a spray-can texture product, or applying joint compound with a brush for a knock-down effect. Test your method on a piece of cardboard before applying it to the wall.
Light sanding between coats (using 120-grit sandpaper) helps each layer bond smoothly. It removes ridges and prevents buildup that shows through paint. Always wipe away dust with a damp cloth before applying the next coat.
The content provided on our blog site traverses numerous categories, offering readers valuable and practical information. Readers can use the editorial team’s research and data to gain more insights into their topics of interest. However, they are requested not to treat the articles as conclusive. The website team cannot be held responsible for differences in data or inaccuracies found across other platforms. Please also note that the site might also miss out on various schemes and offers available that the readers may find more beneficial than the ones we cover.